
Cake pop recipe: Imagine a bite-sized treat that’s both delicious and visually appealing. Cake pops are the perfect answer, combining the comforting flavors of cake with the playful fun of candy. They’re a versatile treat that can be customized to match any occasion, from birthday parties to holiday celebrations.
Whether you’re a seasoned baker or just starting out, this guide will walk you through the process of creating perfect cake pops from scratch. We’ll cover everything from selecting the right ingredients to mastering dipping and decorating techniques. Get ready to embark on a sweet adventure that will leave you with a mouthwatering masterpiece!
Introduction to Cake Pops
Cake pops are a delightful and versatile treat that has gained immense popularity worldwide. They are essentially bite-sized cake balls dipped in chocolate and adorned with various decorative elements, offering a delightful combination of textures and flavors.
Origins and Popularity
Cake pops emerged in the early 2000s, gaining widespread recognition after a baker named Angie Dudley introduced them to the public. The popularity of cake pops can be attributed to their convenient size, portability, and customizable nature. They are perfect for parties, celebrations, and everyday indulgences.
Essential Ingredients
The foundation of a delicious cake pop lies in its ingredients. These ingredients work together to create the perfect balance of texture and flavor, making each bite a delightful experience. Let’s explore the key ingredients that make up a cake pop.
Cake
Cake is the base of the cake pop, providing the structure and flavor. It can be made from scratch or purchased pre-made. The type of cake you choose will influence the final flavor and texture of your cake pops.
For instance, a chocolate cake will create a rich and decadent cake pop, while a vanilla cake will provide a classic and versatile flavor.
Frosting
Frosting is crucial for binding the cake crumbs together and adding a layer of sweetness and flavor. It also acts as a glue, holding the cake pop together as it’s dipped in chocolate. There are various frosting options available, including buttercream, cream cheese frosting, and even whipped cream.
The choice of frosting depends on your personal preference and the desired flavor profile.
Chocolate
Chocolate is the final touch that gives the cake pop its iconic look and adds a satisfyingly smooth texture. It acts as a coating, protecting the cake and frosting from drying out. Melting chocolate is a crucial step in the process.
There are different types of chocolate available, such as milk chocolate, dark chocolate, and white chocolate, each with its unique flavor and melting properties.
Other Ingredients
Additional ingredients may be used to enhance the flavor and texture of the cake pops. These include:
- Sprinkles: Sprinkles add a touch of color and fun to the cake pops. They can be used to create various designs and patterns.
- Nuts: Chopped nuts can be added to the cake batter or sprinkled on the chocolate coating for a crunchy texture and nutty flavor.
- Candy: Candy pieces can be added to the frosting or used as decorations on the chocolate coating, adding a sweet and playful touch.
Cake Batter Preparation
The cake batter is the foundation of your cake pops. You can use a simple vanilla cake batter, or experiment with different flavors to create unique and delicious cake pops.
Basic Vanilla Cake Batter Recipe
This basic recipe serves as a great starting point for your cake pop adventures. You can easily adapt it to create various flavors by adding extracts, spices, or other ingredients.
- 1/2 cups (190g) all-purpose flour
- /2 teaspoon baking powder
- /4 teaspoon salt
- /2 cup (113g) unsalted butter, softened
- 1/4 cups (250g) granulated sugar
- large eggs
- teaspoon vanilla extract
- /2 cup (120ml) milk
Instructions
- Preheat your oven to 350°F (175°C) and grease and flour a 9×13 inch baking pan.
- In a medium bowl, whisk together the flour, baking powder, and salt.
- In a large bowl, cream together the butter and sugar until light and fluffy. Beat in the eggs one at a time, then stir in the vanilla extract.
- Gradually add the dry ingredients to the wet ingredients, alternating with the milk, beginning and ending with the dry ingredients. Beat until just combined.
- Pour the batter into the prepared pan and bake for 30-35 minutes, or until a toothpick inserted into the center comes out clean.
- Let the cake cool completely before crumbling it for your cake pops.
Cake Flavor Variations
Adding flavor to your cake pops is a fun way to personalize them. Here are a few ideas to get you started:
Chocolate
- Use cocoa powder in place of some of the flour in the basic recipe.
- Add chocolate chips or chunks to the batter.
- Use chocolate extract instead of vanilla extract.
Lemon
- Add lemon zest and lemon juice to the batter.
- Use lemon extract instead of vanilla extract.
Red Velvet
- Use buttermilk instead of milk.
- Add red food coloring to the batter.
- Use cocoa powder and red food coloring to achieve the classic red velvet color and flavor.
Other Flavor Ideas
- Add spices like cinnamon, nutmeg, or ginger for warm, comforting flavors.
- Use fruit purees or extracts to incorporate fruity flavors.
- Get creative and experiment with different flavor combinations!
Baking and Cooling the Cake

The next step in our cake pop journey is to bake the cake batter. This crucial stage sets the foundation for delicious and moist cake pops. Baking the cake properly ensures a soft and crumbly texture, which is essential for creating perfectly shaped and flavorful cake pops.
Baking the Cake
The baking time and temperature will vary depending on the size and type of pan you are using. It is essential to follow the recipe’s instructions carefully to achieve the desired texture. Here are some general tips for baking your cake:
- Preheat your oven to the temperature specified in the recipe. This ensures that the cake bakes evenly and does not become dense or dry.
- Grease and flour the cake pan. This prevents the cake from sticking to the pan and ensures easy removal after baking.
- Bake the cake until a toothpick inserted into the center comes out clean. This indicates that the cake is fully cooked and ready to be removed from the oven.
- Allow the cake to cool completely in the pan before inverting it onto a wire rack to cool completely. This prevents the cake from crumbling and ensures that it is ready for the next step.
Cooling the Cake
Cooling the cake completely is a crucial step that often gets overlooked. This step ensures that the cake is firm enough to be crumbled and shaped into cake pops. Here are the reasons why cooling the cake is essential:
- Prevents Crumbling:A warm cake is delicate and prone to crumbling when handled. Cooling allows the cake to solidify, making it easier to work with.
- Enhances Flavor:As the cake cools, the flavors have time to develop and meld, resulting in a richer and more complex taste.
- Ensures Smooth Shaping:A cooled cake is easier to crumble and shape into uniform balls, which are essential for creating perfectly shaped cake pops.
Crumbling and Mixing

The cooled cake needs to be broken down into fine crumbs before it can be mixed with frosting. This step is crucial for creating the smooth and cohesive base for the cake pops.
Crumbling the Cake
The cake needs to be completely cooled before crumbling. This allows the cake to firm up and makes it easier to break down into fine crumbs. A fork or a pastry blender can be used for this step.
Combining Cake Crumbs and Frosting
The cake crumbs are combined with frosting to create a workable mixture that can be shaped into balls. The frosting acts as a binder, holding the crumbs together and giving the cake pops their shape and structure. There are two ways to combine the crumbs and frosting.
- The first method is to add the frosting to the cake crumbs gradually, mixing well after each addition until the mixture is well combined and moist.
- The second method is to use an electric mixer to combine the cake crumbs and frosting.
This method is faster and can be helpful if you are making a large batch of cake pops.
Shaping the Cake Pops
Now that you have a delicious cake mixture, it’s time to shape those cake pops into adorable treats. This is where you get to be creative and have some fun! There are a few different methods you can use to form your cake pops into balls.
Using a Cookie Scoop
Cookie scoops are a fantastic tool for shaping cake pops. They come in various sizes, allowing you to create cake pops of different sizes. To use a cookie scoop, simply press it into the cake mixture and scoop out a ball.
It’s important to ensure the cake mixture is cool enough to hold its shape before scooping.
Here are some tips for using a cookie scoop:
- Choose a scoop size that matches your desired cake pop size. Smaller scoops create smaller cake pops, while larger scoops create larger cake pops.
- Press the scoop into the cake mixture and twist to ensure you get a full scoop.
- Gently tap the scoop on the side of the bowl to release the cake pop ball.
Using Spoons
Spoons can also be used to shape cake pops, especially if you don’t have a cookie scoop. You can use a teaspoon or tablespoon, depending on the size of cake pops you want.
Spoon shaping is a great option if you’re looking for a more rustic or irregular shape.
Here’s how to shape cake pops with spoons:
- Use a spoon to scoop out a small amount of cake mixture.
- Roll the mixture between your palms to form a ball.
- Repeat this process until all the cake mixture is shaped into balls.
Rolling the Cake Pops by Hand
For a more personalized touch, you can shape your cake pops by hand. This method requires a bit more patience, but it allows you to create unique shapes and sizes.
To roll cake pops by hand, use your hands to form the cake mixture into balls.
Here are some tips for hand-rolling cake pops:
- Make sure your hands are clean and slightly damp to prevent the cake mixture from sticking.
- Take a small amount of cake mixture and roll it between your palms until it forms a smooth ball.
- Repeat this process until all the cake mixture is shaped into balls.
Dipping and Decorating
Now that your cake pops are shaped, it’s time to give them a delicious and eye-catching finish! This step involves dipping the pops in melted chocolate and then adding decorative elements to create unique and appealing treats.
Melting Chocolate and Dipping
The first step in decorating your cake pops is melting the chocolate. This can be done using a double boiler or in the microwave. Using a double boiler ensures a more controlled melting process, reducing the risk of burning the chocolate.
If you are using the microwave, melt the chocolate in short intervals, stirring in between to prevent overheating. Here are some tips for melting chocolate and dipping the cake pops:
Use high-quality chocolate for best results.
Choose a dipping chocolate that is specifically designed for dipping.
Melt the chocolate slowly and gently, stirring frequently to ensure even melting.
Dip the cake pops into the melted chocolate, ensuring they are fully coated.
Notice tips beli iphone bekas for recommendations and other broad suggestions.
Allow the chocolate to set before decorating.
Decorating Techniques
Once the chocolate has set, it’s time to unleash your creativity and decorate your cake pops. There are numerous decorating techniques you can use to create stunning designs.
Drizzling
Drizzling is a simple yet effective decorating technique. You can create beautiful patterns by drizzling melted chocolate over the cake pops. You can use a fork or a piping bag to create different designs.
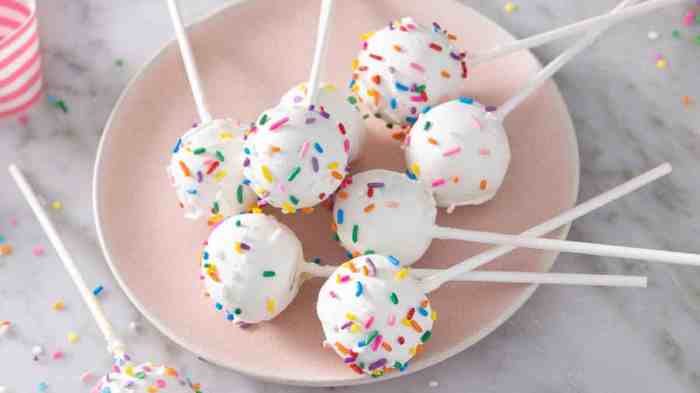
Sprinkles
Sprinkles are a classic cake pop decoration. They come in a variety of colors, shapes, and sizes, allowing you to create endless possibilities. You can simply sprinkle the pops with sprinkles after dipping them in chocolate or use a toothpick to attach sprinkles to specific areas.
Other Embellishments
Beyond drizzling and sprinkles, you can use various other embellishments to decorate your cake pops. Here are some ideas:
- Candy melts: Candy melts come in a variety of colors and can be used to create different designs, such as stripes or polka dots.
- Chocolate chips: Chocolate chips can be used to create simple designs, such as swirls or dots.
- Nuts: Chopped nuts can be used to add texture and flavor to your cake pops.
- Candy: Small candies, such as M&Ms or Skittles, can be used to create unique and colorful designs.
- Edible glitter: Edible glitter can add a touch of sparkle to your cake pops.
Setting and Storage: Cake Pop Recipe

After dipping your cake pops, it’s important to allow them to set properly for the chocolate coating to harden. This ensures a smooth, professional-looking finish and prevents them from becoming messy.Proper storage is crucial to maintaining the freshness and quality of your cake pops.
There are a few different methods to choose from, depending on your preferences and how long you plan to store them.
Setting Time
The setting time for dipped cake pops can vary depending on the type of chocolate used and the temperature of your environment. Generally, it takes about 30 minutes to an hour for the chocolate to harden completely at room temperature.
You can speed up the setting process by placing the cake pops in the refrigerator for 15-20 minutes.
Storage Methods
- Refrigerator Storage:This is the best method for long-term storage, as it helps to prevent the chocolate from melting and the cake from drying out. Store cake pops in an airtight container or wrap them individually in plastic wrap. They can be stored in the refrigerator for up to 3-4 days.
- Freezing:Cake pops can also be frozen for up to 2-3 months. Wrap them individually in plastic wrap and then place them in an airtight container or freezer bag. When ready to eat, thaw them in the refrigerator overnight.
- Room Temperature Storage:If you plan to eat your cake pops within a day or two, you can store them at room temperature in an airtight container. However, this is not recommended for long-term storage, as the chocolate may soften and the cake may become dry.
Cake Pop Variations
The beauty of cake pops lies in their versatility. You can experiment with different flavors, fillings, and decorations to create unique and delicious treats. Let’s explore some exciting variations to take your cake pops to the next level.
Flavor Combinations, Cake pop recipe
Different cake flavors offer a unique taste experience. Here are some popular cake pop flavor combinations:
- Chocolate Cake Pops:A classic and crowd-pleasing choice, chocolate cake pops are made with rich chocolate cake, often combined with chocolate chips or cocoa powder for extra intensity. They are typically dipped in chocolate and decorated with sprinkles or drizzles.
- Vanilla Cake Pops:A blank canvas for creativity, vanilla cake pops are incredibly versatile. They can be dipped in various colors and decorated with different toppings, from sprinkles to candies to nuts.
- Red Velvet Cake Pops:Known for their distinctive red hue and tangy flavor, red velvet cake pops are a festive choice. They are often dipped in white chocolate and decorated with red sprinkles or a red velvet drizzle.
Filling Ideas
Adding a filling to your cake pops can add an extra layer of flavor and texture. Here are some popular filling options:
- Nutella:A decadent and popular choice, Nutella adds a rich chocolate and hazelnut flavor to cake pops. It’s best to use Nutella that has been slightly warmed for easier spreading.
- Fruit Preserves:Add a touch of sweetness and tartness with fruit preserves like strawberry, raspberry, or blackberry. The preserves add a burst of flavor and a delightful contrast to the cake.
- Cream Cheese Filling:For a tangy and creamy filling, try a mixture of cream cheese and powdered sugar. This filling pairs well with red velvet or vanilla cake pops.
Cake Pop Presentation

Cake pops are a delightful treat that can be enjoyed on any occasion. Their versatility and charming appearance make them perfect for parties, weddings, birthdays, or even just a casual snack. But to truly showcase their beauty and deliciousness, it’s essential to present them in a way that enhances their visual appeal and complements their flavor.
Presentation Ideas
A well-presented cake pop is an invitation to indulge. To achieve this, consider the following presentation ideas:
- Display Stand:A tiered cake stand is a classic and elegant way to present cake pops. It creates a visually appealing display and allows you to showcase a variety of flavors and designs.
- Cake Pop Bouquet:For a unique and festive touch, arrange cake pops in a bouquet-like formation. Use decorative paper or ribbon to create a stem for each pop, and gather them together in a vase or a decorative container.
- Mason Jar Display:Mason jars are versatile and charming containers that can be used for various purposes. Fill a mason jar with colorful cake pops for a whimsical and rustic display.
- Cake Pop Tree:For a whimsical and festive presentation, create a cake pop tree. Use a Styrofoam cone as the base and insert cake pops into the cone, creating a tree-like shape.
- Cake Pop Wall:Create a visually stunning display by arranging cake pops on a wall. Use a piece of cardboard or foam board as the base and attach the cake pops using toothpicks or skewers.
Examples of Visually Appealing Arrangements
Here are some examples of visually appealing ways to arrange and display cake pops:
- Color Gradient:Arrange cake pops in a gradient of colors, starting with the darkest shade at the bottom and transitioning to the lightest shade at the top. This creates a visually appealing and harmonious display.
- Geometric Patterns:Arrange cake pops in geometric patterns, such as squares, circles, or triangles. This creates a modern and eye-catching display.
- Themed Display:For a themed event, such as a birthday party or a wedding, arrange cake pops in a way that reflects the theme. For example, for a tropical-themed party, you could use bright colors and tropical fruits to decorate the cake pops.
- Cake Pop Bar:Set up a cake pop bar with a variety of flavors, toppings, and decorations. This allows guests to customize their own cake pops and create their own unique combinations.
Ultimate Conclusion
With a little creativity and these easy-to-follow steps, you’ll be able to create cake pops that are both delicious and visually stunning. So gather your ingredients, put on your apron, and get ready to have some fun in the kitchen.
The possibilities are endless when it comes to cake pop flavors, decorations, and presentations. Let your imagination run wild and create cake pops that are uniquely yours!