
Plum jelly recipe, a culinary delight with a rich history, brings together the sweetness of plums and the tang of pectin to create a versatile spread. From breakfast toast to savory sauces, plum jelly’s versatility makes it a staple in kitchens worldwide.
This recipe explores the origins, ingredients, and techniques for crafting this delicious condiment. We’ll delve into the fascinating world of plums, from their selection to their transformation into a delightful jelly.
Introduction to Plum Jelly: Plum Jelly Recipe
Plum jelly, a sweet and tart spread, has been enjoyed for centuries. Its origins can be traced back to ancient times, with evidence suggesting its production in various cultures across the globe. The versatility of plums, combined with their natural pectin content, made them an ideal fruit for preserving and transforming into a delectable jelly.The history of plum jelly is intertwined with the cultivation and consumption of plums.
Plums, belonging to the genus Prunus, have been cultivated for thousands of years, with evidence of their domestication dating back to ancient China and the Mediterranean region. The art of preserving fruits, including plums, emerged as a way to extend their shelf life and enjoy them during times when fresh produce was scarce.
Cultural Significance of Plum Jelly
Plum jelly holds cultural significance in various regions around the world. In Europe, it is often associated with traditional cuisine, particularly in countries like France, Germany, and England. Plum jelly is frequently used as a condiment for savory dishes, such as roast meats and cheeses, or as a filling for pastries and desserts.
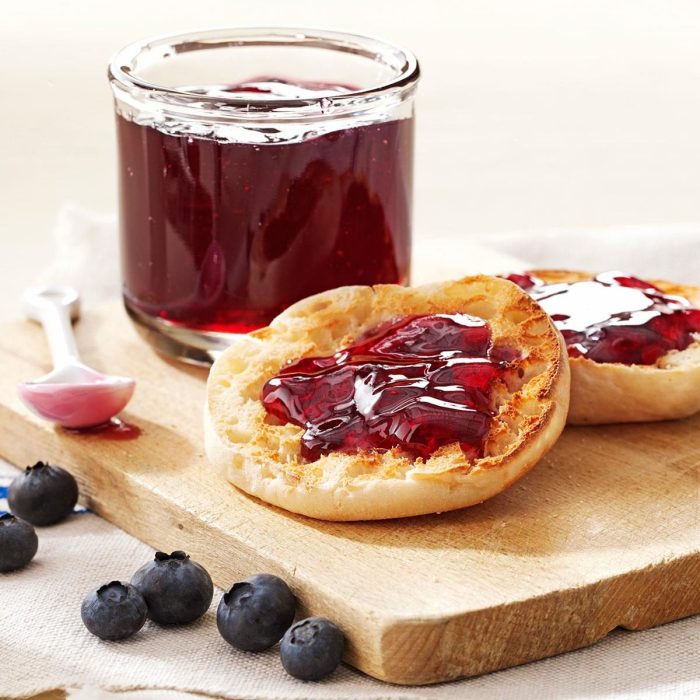
In North America, plum jelly is a popular spread for breakfast and brunch, often enjoyed on toast or biscuits. It is also used in various recipes, including cakes, pies, and sauces. The vibrant color and unique flavor of plum jelly have made it a beloved ingredient in both sweet and savory dishes.
Interesting Facts and Anecdotes
- Plum jelly is a good source of antioxidants, which can help protect the body against damage from free radicals.
- The color of plum jelly can vary depending on the variety of plums used. Some plums produce a deep purple jelly, while others yield a lighter pink or red hue.
- In some cultures, plum jelly is believed to have medicinal properties. For example, in traditional Chinese medicine, plums are thought to have a cooling effect and can help to alleviate coughs and sore throats.
- Plum jelly can be used as a natural food dye. Its vibrant color can be used to add a touch of whimsy to desserts and drinks.
Ingredients and Preparation
The key to a delicious plum jelly lies in using the right ingredients and preparing them properly. The quality of the plums is paramount, and their preparation plays a crucial role in achieving the desired texture and flavor.
Plum Selection and Preparation
Using ripe and high-quality plums is essential for a flavorful and vibrant jelly. Ripe plums have a deeper color and a sweet aroma, indicating their optimal sugar content.
- Choose plums that are firm but slightly soft to the touch.This ensures they are ripe and will release their juice easily.
- Avoid plums that are bruised or damaged.These plums may harbor bacteria that can affect the taste and safety of the jelly.
- Wash the plums thoroughly under cold running water.This removes any dirt or debris that may be present on the surface.
- Pit the plums using a plum pitter or a sharp knife.Remove the pit and any remaining flesh around it.
- Chop the plums into small pieces.This helps to extract the juice more efficiently during the cooking process.
Ingredients, Plum jelly recipe
The ingredients for plum jelly are relatively simple, but their roles are crucial in creating the desired consistency and flavor.
- Plums:The star of the show, plums provide the natural sweetness, flavor, and color to the jelly. Ripe plums are key for a vibrant color and rich flavor.
- Sugar:Sugar acts as a preservative, preventing the growth of bacteria and giving the jelly its characteristic texture. The amount of sugar used can vary depending on the sweetness of the plums and personal preference.
- Lemon juice:Lemon juice adds a touch of acidity, balancing the sweetness of the plums and enhancing the overall flavor profile. It also helps to set the jelly, ensuring it achieves a firm consistency.
- Pectin:Pectin is a natural gelling agent extracted from fruits. It helps to thicken the juice and create the characteristic jelly consistency. You can use commercially available pectin or make your own from apple peels or other fruit sources.
Cooking and Setting the Jelly
Once you have your plum juice, you’re ready to transform it into delicious jelly. This involves cooking the juice to concentrate its flavor and then adding sugar and pectin to help it set.
Cooking the Plum Juice
The first step in making plum jelly is to cook the plum juice to concentrate its flavor and reduce its volume. This process, known as “boiling down,” typically takes 15-20 minutes. You’ll need to cook the juice until it reaches a specific consistency, which is usually indicated in your recipe.
- Use a wide, shallow pan:This allows for faster evaporation and prevents the juice from scorching.
- Skim off foam:As the juice boils, a foam will form on the surface. Skimming this foam off helps to ensure a clear jelly.
- Monitor the temperature:A candy thermometer is a helpful tool for monitoring the temperature of the juice. Most recipes will specify a target temperature, usually around 220°F (104°C), to ensure proper setting.
- Use a spoon test:You can also check the consistency of the juice by placing a spoonful on a chilled plate. If the juice sets up quickly and wrinkles when you push it with your finger, it’s ready to be bottled.
Adding Sugar and Pectin
Once the plum juice has been cooked down, you’ll need to add sugar and pectin to help it set. Pectin is a natural substance found in fruits that helps to create the gel structure of jelly. Sugar helps to preserve the jelly and also contributes to its sweetness.
- Use a reliable recipe:Following a tested recipe is crucial for achieving the desired consistency and setting of the jelly. Different recipes will call for varying amounts of sugar and pectin, depending on the type of fruit and the desired sweetness.
- Add sugar and pectin gradually:Stir the sugar and pectin into the hot juice slowly to prevent clumping.
- Bring to a rolling boil:Once the sugar and pectin are dissolved, bring the mixture to a rolling boil for a specified time, usually 1-2 minutes, to activate the pectin. This ensures that the jelly will set properly.
Setting the Jelly
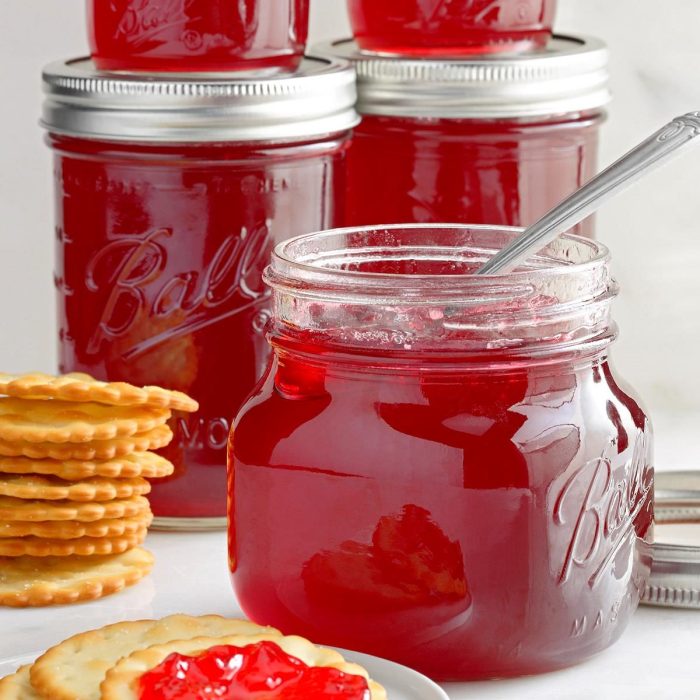
After cooking the jelly, it’s time to pour it into sterilized jars and let it set.
- Sterilize jars and lids:This prevents the jelly from spoiling. You can sterilize jars by boiling them in water for 10 minutes.
- Pour hot jelly into jars:Leave about 1/2 inch of headspace at the top of each jar.
- Wipe rims and seal:Wipe the rims of the jars with a clean cloth to remove any spills. Securely fasten the lids.
- Process jars:Most recipes will recommend processing the jars in a water bath to create a vacuum seal and ensure long-term storage. This involves placing the filled jars in a pot of boiling water for a specified time, typically 10-15 minutes.
Important:Always follow the specific instructions in your recipe for cooking, setting, and processing the jelly.
Variations and Flavors

The basic plum jelly recipe can be adapted to create a variety of flavors and textures. You can experiment with different types of plums, add spices, herbs, or citrus, or even incorporate liqueurs for a more complex flavor profile.
Spiced Plum Jelly
Spices can add warmth and depth to plum jelly. Here’s a recipe for spiced plum jelly:
Ingredients:
- 4 cups of plums, pitted and chopped
- 1 cup of water
- 1 cup of sugar
- 1/2 teaspoon of ground cinnamon
- 1/4 teaspoon of ground cloves
- 1/4 teaspoon of ground nutmeg
Instructions:
- Combine the plums, water, sugar, cinnamon, cloves, and nutmeg in a large saucepan.
- Bring to a boil over medium heat, stirring constantly.
- Reduce heat to low and simmer for 30 minutes, or until the mixture has thickened.
- Remove from heat and let cool slightly.
- Strain the mixture through a fine-mesh sieve, pressing on the solids to extract as much juice as possible.
- Return the juice to the saucepan and bring to a boil over medium heat.
- Cook for 5 minutes, or until the jelly has reached setting point.
- Pour the jelly into sterilized jars and seal tightly.
Plum Jelly with Citrus
Citrus fruits can add a bright and tangy flavor to plum jelly. Here’s a recipe for plum jelly with lemon:
Ingredients:
- 4 cups of plums, pitted and chopped
- 1 cup of water
- 1 cup of sugar
- 1/2 cup of lemon juice
Instructions:
- Combine the plums, water, sugar, and lemon juice in a large saucepan.
- Bring to a boil over medium heat, stirring constantly.
- Reduce heat to low and simmer for 30 minutes, or until the mixture has thickened.
- Remove from heat and let cool slightly.
- Strain the mixture through a fine-mesh sieve, pressing on the solids to extract as much juice as possible.
- Return the juice to the saucepan and bring to a boil over medium heat.
- Cook for 5 minutes, or until the jelly has reached setting point.
- Pour the jelly into sterilized jars and seal tightly.
Serving and Storage
Plum jelly, with its vibrant color and sweet-tart flavor, is a versatile treat that can elevate your meals and snacks. From breakfast spreads to dessert accompaniments and even savory applications, there are countless ways to enjoy this homemade delicacy.
Learn about more about the process of butter swim biscuits recipe in the field.
Serving Plum Jelly
Here are some ideas for serving plum jelly:
- Breakfast:Spread plum jelly on toast, biscuits, or pancakes for a sweet and tangy start to your day. It pairs well with cream cheese, yogurt, and granola.
- Dessert:Serve plum jelly with cheese and crackers, ice cream, or fruit salad. It can also be used as a glaze for cakes, cookies, and other desserts.
- Savory:Plum jelly adds a touch of sweetness and acidity to savory dishes. Try it as a glaze for grilled chicken or pork, a topping for roasted vegetables, or a condiment for sandwiches.
Storing Plum Jelly
Proper storage is essential to maintain the quality and freshness of your homemade plum jelly.
- Refrigeration:Store plum jelly in an airtight container in the refrigerator. This will help prevent mold growth and maintain its flavor and texture.
- Freezing:If you have a large batch of plum jelly, you can freeze it for longer storage. Pour the jelly into freezer-safe containers, leaving about an inch of headspace for expansion. Freeze for up to 6 months.
Shelf Life of Homemade Plum Jelly
Homemade plum jelly, when properly stored in the refrigerator, typically has a shelf life of 6 to 12 months. However, it’s always a good idea to check for any signs of spoilage, such as mold growth or a change in texture or color.
Nutritional Benefits

Plum jelly, while a sweet treat, can offer some nutritional benefits thanks to its base ingredient – plums. Plums are a good source of various vitamins, minerals, and antioxidants, and these benefits can be partially retained in the jelly-making process.
Nutritional Value of Plums and Plum Jelly
Plums are a good source of fiber, vitamin C, vitamin K, potassium, and antioxidants. However, the nutritional content of plum jelly can vary depending on the recipe and the processing method used.
- Homemade plum jelly tends to retain more nutrients than commercially available options because it typically uses less sugar and avoids artificial ingredients.
- Commercially produced plum jelly often contains added sugar, artificial colors, and flavors, which can reduce its nutritional value.
Potential Health Benefits
The antioxidants present in plums, such as polyphenols and flavonoids, may offer various health benefits, including:
- Improved Digestive Health:The fiber content in plums can help regulate bowel movements and prevent constipation. This benefit may be partially retained in plum jelly, although the fiber content is generally lower.
- Reduced Risk of Heart Disease:The antioxidants in plums have been linked to lower blood pressure and cholesterol levels, which may reduce the risk of heart disease. These benefits may be present in plum jelly to a lesser extent.
- Anti-Inflammatory Properties:Plums contain compounds that may have anti-inflammatory effects, which could help reduce inflammation throughout the body. This benefit may also be present in plum jelly.
Comparison of Homemade and Commercial Plum Jelly
| Nutrient | Homemade Plum Jelly | Commercial Plum Jelly |
|---|---|---|
| Sugar Content | Lower, typically only natural sugars from plums | Higher, often contains added sugar, corn syrup, or other sweeteners |
| Fiber Content | Lower than fresh plums, but higher than commercial options | Very low, most fiber is lost during processing |
| Vitamin C | Partially retained, but lower than fresh plums | May be added artificially, or lost during processing |
| Antioxidants | Partially retained, but lower than fresh plums | May be added artificially, or lost during processing |
Plum Jelly Recipes
Plum jelly recipes offer a delightful way to preserve the sweet and tart flavors of plums, creating a versatile spread for bread, cheese, and desserts. From classic recipes to unique variations, there’s a plum jelly recipe for every taste preference.
Plum Jelly Recipes
| Recipe Name | Ingredients | Instructions | Notes |
|---|---|---|---|
| Classic Plum Jelly |
|
|
This classic recipe produces a vibrant, deep purple jelly with a sweet and tart flavor. |
| Spiced Plum Jelly |
|
|
This recipe adds warm spices like cinnamon, cloves, and ginger to the classic plum jelly for a complex and comforting flavor. |
| Plum and Ginger Jelly |
|
|
This recipe features a vibrant ginger flavor that adds a spicy kick to the sweetness of the plums. |
| Plum and Lemon Jelly |
|
|
This recipe balances the sweetness of the plums with a bright and tangy lemon flavor. |
Last Word

Making plum jelly is a rewarding experience that allows you to savor the essence of the season. From the initial selection of ripe plums to the final jar of glistening jelly, each step is a journey of culinary discovery. Whether you’re a seasoned cook or a novice in the kitchen, this recipe provides a clear and engaging guide to creating a delicious and memorable treat.